
MicroZed Chronicles: Spartan 7 Tile and Simulink
- Adam Taylor
- 1 hour ago
- 4 min read
We developed the Spartan 7 Embedded System tile as we thought it would be great for use in control plane applications. Of course the XC7S25 version is also very useful for signal processing and conditioning applications, it is amazing how much we are able to pack into it.
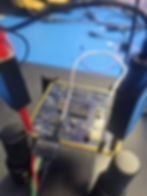
This got me thinking as I wanted to also be able to connect to this board to my Simulink environment such that I could perform FPGA in the loop verification of algorithms that might run on the tile.
To do this I first needed to add in a custom board to the FPGA board manager. By opening the FPGA board manager and clicking create custom board we are able to define a new board file.

The next step in the board file creation is to define the actual target FPGA in this instance it is a XC7S25CSGA225-1.

The next step is to define the clock pin and the connection style for FPGA in the Loop, for this instance we will be using JTAG.

The next step allows the definition of the JTAG network and the crucially setting the JTAG clock frequency.

The final tab allows us to build a application for test on the target board and if the target board is connected then we can connect to it and download the created test application.

Clicking finish will now show the new target board available within the FPGA board manager.

Once this is completed it is possible to examine the Vivado project created, during the flow test.

To test this I thought I would create a simple Simulink module which flashes the LED at 1 HZ. To do this into a Simulink diagram I added the following.
Counter – Set to count to 100 000 000 which aligns with the clock frequency on board
Relation operator – set to equal, this compares the output of the count with a constant.
Switch – when the input is false the output of the register is recirculated, when try the output of switch is the inverse of the input. This will flip the output of the register, at the desired frequency.

For simulation sake I initially set the counter to 100 and ran the simulation.

This showed the output toggling at the expected rate e.g. when the terminal count was reached.
The next step was to try out the FPGA in the loop approach, targeting the Spartan 7 Embedded System Tile.
The first step in this process was to used the HDL workflow advisor and select the target as the FPGA in the loop and select the target device.
After a slight change to the constant output type to change it from a double to a fixed unsigned type the same as the count generated we were able to run the FPGA in the Loop.

The first stage of this is to build the bit stream.

Once the bit stream is completed, we will see a generated model being created which contains the original design in Simulink and the implementation running on the hardware.

To demonstrate the difference between the two, Simulink opens a comparison window between the original model and the FIL model. As this is pretty simple we can see there is no real difference, but if we were looking at signal processing etc it might be very different.

I like FPGA in the loop and will be using it quite often for development of projects, as we move forward especially for some imaging and AI projects.
UK FPGA Conference
FPGA Horizons - October 7th 2025 - THE FPGA Conference, find out more here
Workshops and Webinars
If you enjoyed the blog why not take a look at the free webinars, workshops and training courses we have created over the years. Highlights include
Upcoming Webinars Timing, RTL Creation, FPGA Math and Mixed Signal
Professional PYNQ Learn how to use PYNQ in your developments
Introduction to Vivado learn how to use AMD Vivado
Ultra96, MiniZed & ZU1 three day course looking at HW, SW and PetaLinux
Arty Z7-20 Class looking at HW, SW and PetaLinux
Mastering MicroBlaze learn how to create MicroBlaze solutions
HLS Hero Workshop learn how to create High Level Synthesis based solutions
Perfecting Petalinux learn how to create and work with PetaLinux OS
Boards
Get an Adiuvo development board
Adiuvo Spartan 7 / RPi 2040 Embedded System Development Board
Adiuvo Spartan 7 Tile - Low Risk way to add a FPGA to your design.
Embedded System Book
Do you want to know more about designing embedded systems from scratch? Check out our book on creating embedded systems. This book will walk you through all the stages of requirements, architecture, component selection, schematics, layout, and FPGA / software design. We designed and manufactured the board at the heart of the book! The schematics and layout are available in Altium here Learn more about the board (see previous blogs on Bring up, DDR validation, USB, Sensors) and view the schematics here.