A few weeks ago, we looked at how we could build the hardware element of our Nios V processor using Quartus Prime and Platform Designer. This week we are going to look at how we can create a simple software application which can run on the Nios V processor. To do this we need to generate an Board Support Package, Application SW and download and debug it on the execution target.
To do this we will be using the following tools
1. Platform Designer – Create the BSP
2. Nios V Shell – Create the application
3. Ashling RiscFree IDE – Download and debug the application
The completed SW flow looks as below and is based around cmake files and make

To create the BSP we need open Platform designer and from the file menu select a new BSP.

Once the new BSP has been selected a dialog box will appear asking us where we want to save the BSP and the target CPU name and Operating system. The target CPU name should be auto populated from the Qsys file which defines the Nios V system.

This will open the BSP configuration dialog on the right hand side of the screen, in this dialog we can configure the HAL, drivers, and enable logging if we so desire. For this application I set the Sys clk timer and timestamp timer to none and generated the BSP.

With the BSP is created we are in a position that we can close platform designer and start with the application creation. To do this we need to first open the NIOS V shell this will be available under the Quartus Prime Installation directory.

We use the shell to create applications and libraries and if necessary update BSPs also.
With the NIOS V shell open we are able to create a new application with the command
Niosv-app -b../SW -a=. -s=.

What this means is we are creating an application in the current directory (-a) the software files are in the same directory (-s) and the BSP (-b) is located above in the SW directory. In the directory was a simple C file which contained a hello world application.

Running the command will generate the CMakeLits.txt file which will provide all necessary build information for the application and the BSP.

With the application created we can now open the Ashling RiscFree IDE and debug the application. Select the project workspace we wish to work In and select create project and select the C++ option.

We can enter a project name, and select the project as being CMake driven, and select the location of your SW Application

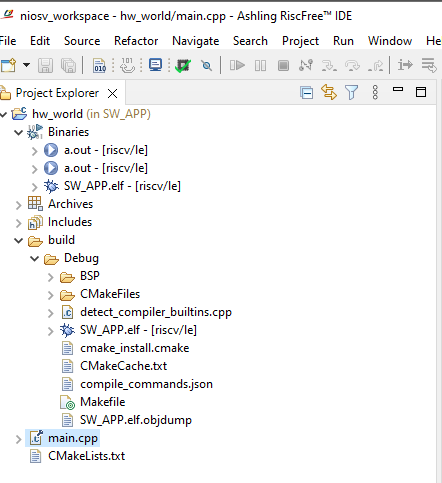
This will open the project in the Ashling RiscFree IDE


To be able to run this application on the Agilex board, we need to first program the board with the SoF file.

Once the processor is running on the Agilex board we can create a new debug configuration, which will download the software application and execute it on the board.

Make sure the device selects the Nios V core

Clicking Debug will down the application to the target

In the Nios V shell, open the jtag uart terminal, with the command juart-terminal

The application once downloaded will halt at the entry point

Execute the application and you will see the output in the JTAG UART terminal

If you want to see this working in more detail I recently did a webinar and live build of the Nios V, the step by step guides and recording can be found here

Comments